Home » News » All News » Applying Online for a Grant
Applying Online for a Grant
Online Shift – Part 2
Applying online for a grant
by Joss Richer, Program Officer
(This blog post is part of a series of tutorials to familiarize you with our new—and evolving—online application system.)
Did you know that since December 2014, you can apply online for a grant? We hope to have all of our programs converted to the online application system early in 2016; but for now, you can only apply online for Career Development grant.
Before you can apply online, you need an account. If you already have one, read on. If you don’t and you’d like to know how to create one, click here.
Assuming that you already have an account, let’s figure out how to apply online for a grant. In the following example, we’ll show you how to apply for a Career Development grant. (If you don’t want to jump back and forth between browser windows, you might want to print this page for easy reference.)
- If you can read this blog entry, chances are that you’re already on the artsnb website—if not, go to ‘artsnb.ca’.
- Click on ‘PROGRAMS’ at the top of the page.

- Then click on ‘Career Development’.

- Scroll down the page and click on the link that starts with ‘NEW – You can now apply…’

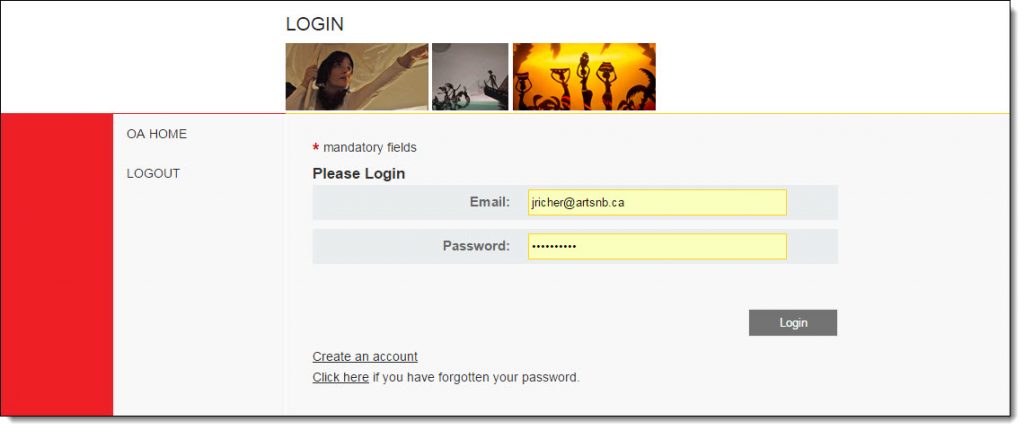
- This will take you to the login page, which looks as follows. To log in, use the email address and the password that you entered when you registered for an account, then click on ‘Login’.
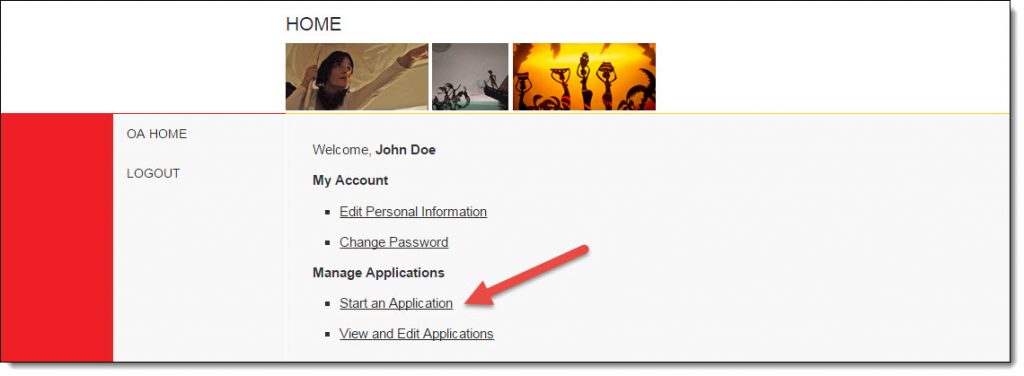
- This will take you to your home page where you’ll have several options, including: updating your personal information, changing your password, as well as starting a new grant application or editing an existing one. For now, click on ‘Start an application’.
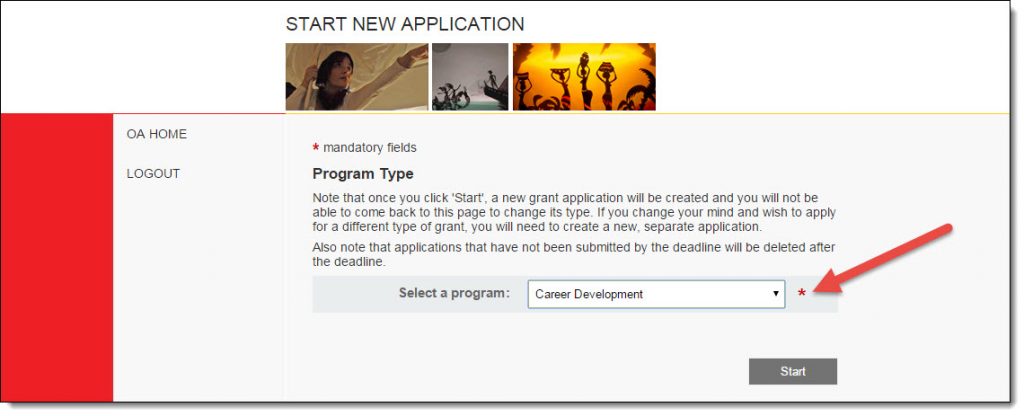
- This is where you get to select the program for which you wish to apply. Your only choice at the time of this writing is ‘Career Development’—other programs will come online later in 2015 or early 2016. Select ‘Career Development’ and click on ‘Start’.
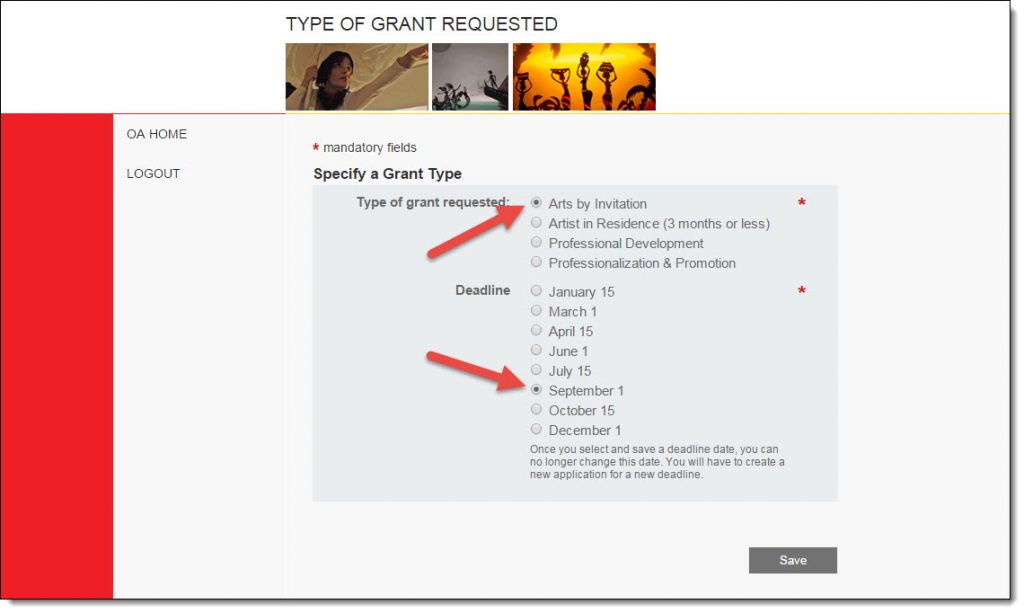
- Note that the Career Development program has four different components and several deadlines throughout the year, which you must specify on this page. In this example, we selected the ‘Arts by Invitation’ component and ‘September 1st’ as the deadline; your choices will probably be different. Note also that you must provide an input or answer anywhere you see a red asterisk (*), otherwise you will be warned that some information is missing when you try to submit the form. Once you’ve selected a grant type and a deadline, click on ‘Save’.
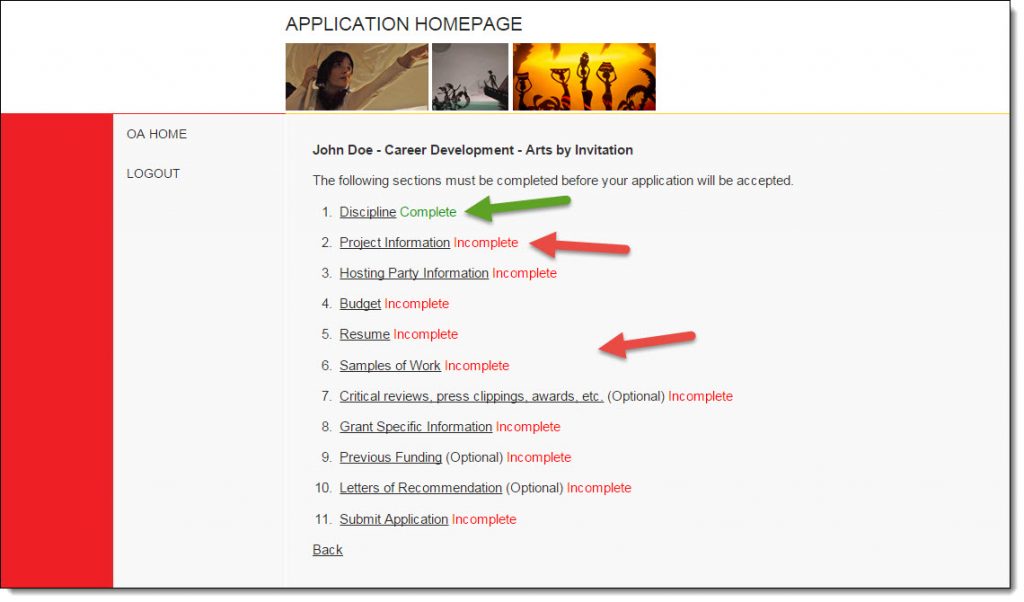
- Now we come to the main page for the grant application. The list of items appearing on this page depends on the type of grant and component that you chose in the previous step. This is essentially the ‘hub’ of the application system. In the following example, we’ve already selected the ‘Discipline’, so that item now shows up as ‘Complete‘; all other items haven’t been dealt with yet, and so they show up as ‘Incomplete‘.
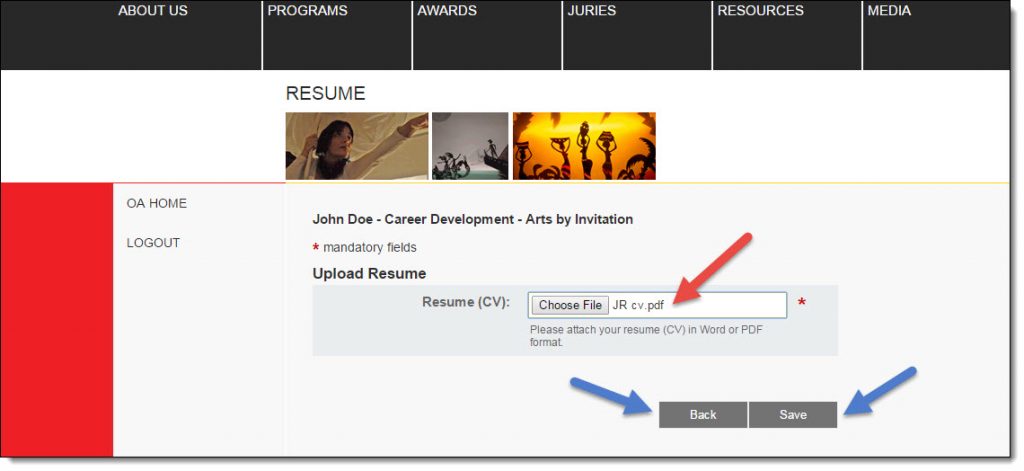
- Click on ‘Resume’, so you can take a peek at what a typical item page looks like. This is a simple page with only one field—other pages might ask you to type text in a box, provide dates, upload files, etc. In this example, we clicked on ‘Choose File’ and selected the appropriate document, which was already on our computer. Once you’ve selected all the required information, you can click on ‘Save’ at the bottom to complete that item. If anything is missing, a warning will appear and prompt you to fill out all required fields. If this happens to you and you still want to leave the page, simply click on ‘Back’.
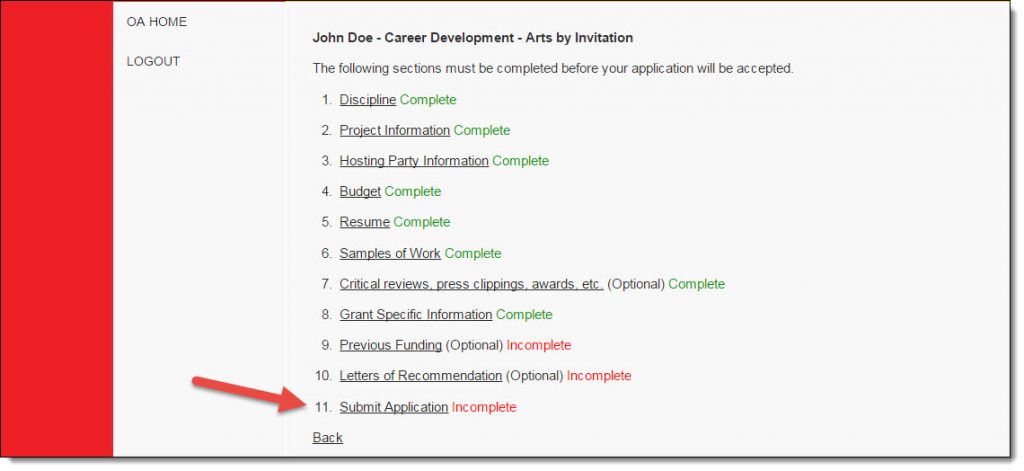
- Note the item ‘Resume’ (back on the main page with the list of items) now shows up as ‘Complete‘. You can repeat the same procedure for all remaining items on the list.

- Once all required items have been dealt with and show up as ‘Complete‘, you can submit your application by clicking on ‘Submit application’. Note that in the following example, some optional items have been omitted, which shouldn’t prevent you from submitting your application.
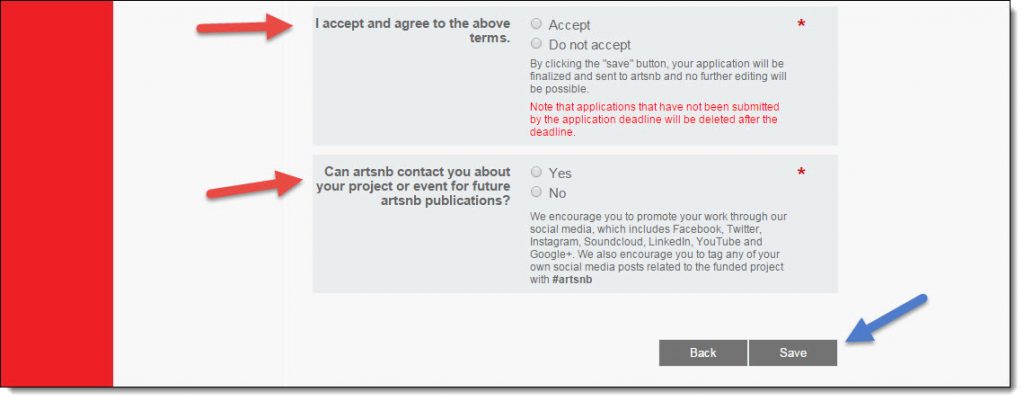
- Clicking on ‘Submit application’ will bring you to a page with several bullet points, which you should read carefully. To complete the process, simply answer the questions at the bottom of the page and click ‘Save’.
- That’s it! Your application has now been submitted to artsnb and can be viewed—and edited if needed–by our program officers. Note that from this point on, you won’t be able to edit your application anymore; you’ll only be able to view it (we’ll show you how to do this next). If any changes need to be made to your application after you’ve submitted it, you will need to contact one of our program officers.
